It’s been awhile!
It’s been a while since I last posted. My apologies for my busy schedule as I am learning new things and running multiple businesses. I will likely focus less on banner images and more on writing content in the future.
*Note: this guide will require basic knowledge on Cloudflare and Web Hosting management. And I will be using Cloudways Hosting for this tutorial.
Do you know?
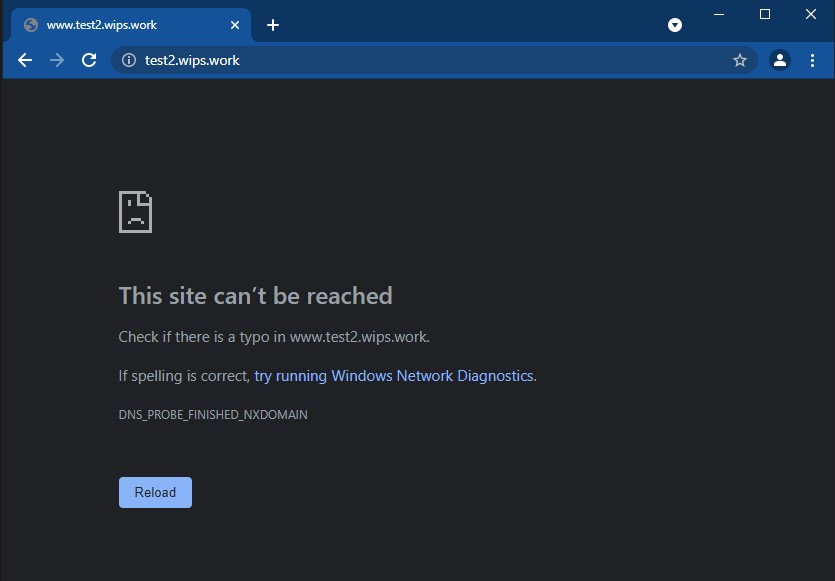
By default, entering www. on sub-domain does not redirect to non-www sub-domain automatically. If the configuration is incorrect, you will receive the error message below:
Step 1: DNS Configuration
I use the free plan from Cloudflare to manage all my domains.
To enable www. on sub domain. You will have to:
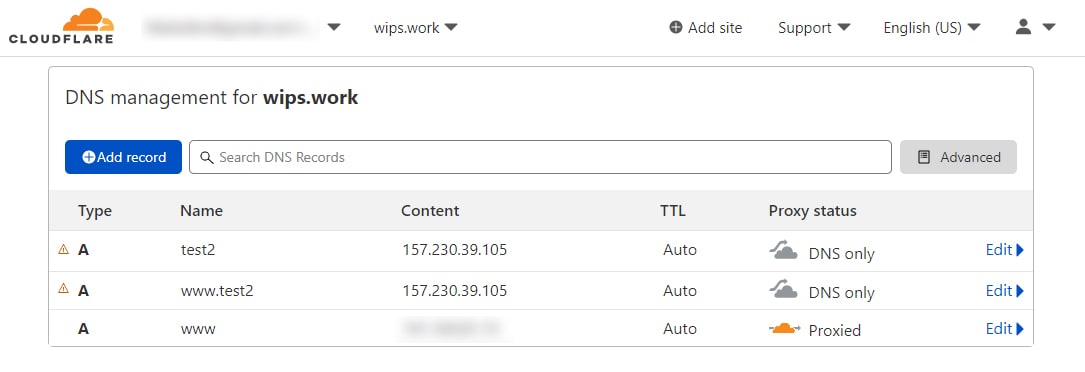
- Create “A record” for the sub domain; e.g. test2 is equivalent to https://test2.wips.work
- Add another “A record” with www. before your sub domain name. e.g. www.test2
- Points both record to your web hosting server IP address
- Important! Set both “Proxy status” to DNS only.
Step 2: Renew SSL certificate
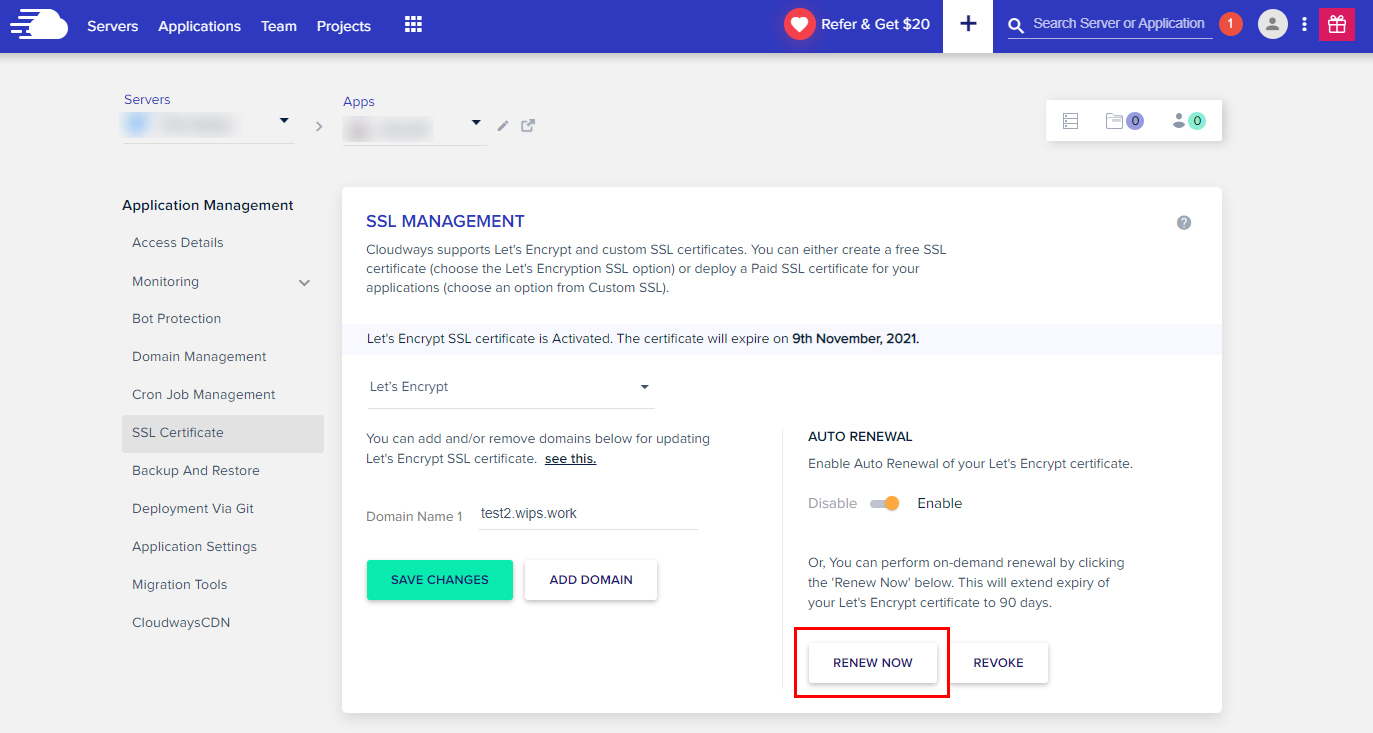
The next step is to renew your SSL certificate. Navigate to your website’s SSL Certificate and click “Renew Now”.
*I’m currently using Let’s Encrypt SSL through Cloudways. This is a free SSL certificate option I love, as it’s incredibly easy to set up and auto-renew for you. Read more about Cloudways in this article: Why Cloudways is my first choice for web hosting
Step 3: Test your URL
Now all you need to do is simply keying the URL. E.g. www.test2.wips.work.
The error message “This site cannot be reached” will no longer appear. Your browser will redirect you to https://test2.wips.work automatically.
That’s all for today, and hopefully it will be useful! Take care, be safe, and stay healthy during this epidemic!


