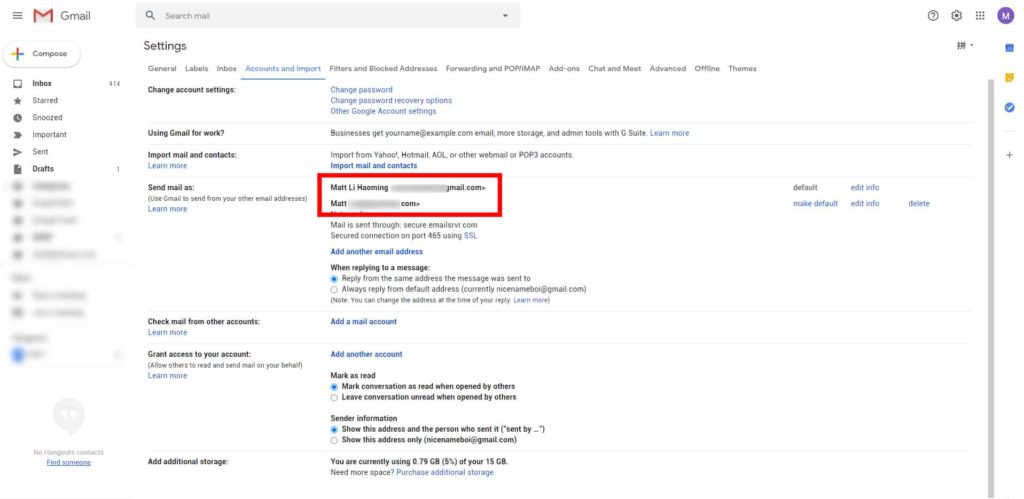
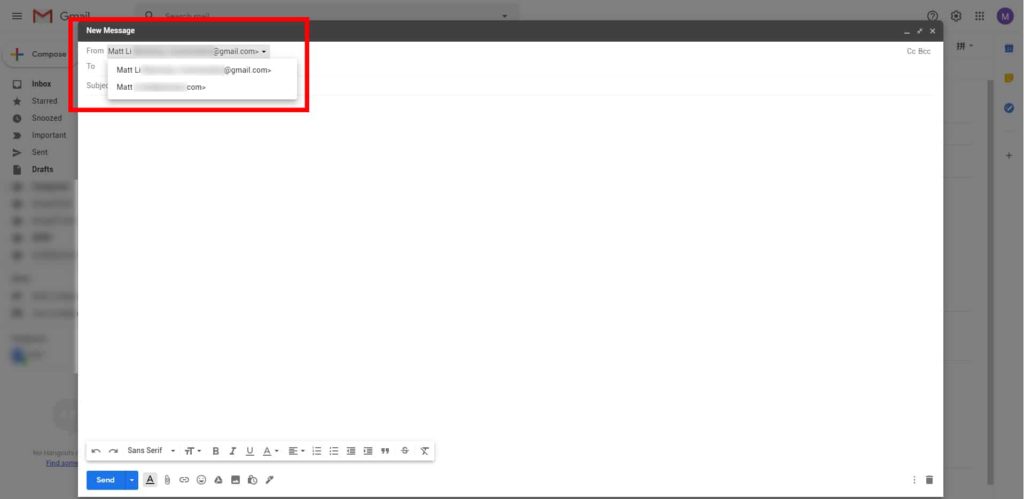
Send/receive business emails via Gmail
Do you know that you can read and compose an email with multiple email accounts in Gmail? *Note: You can do so other email providers such as Yahoo!, Outlook. I prefer Gmail.
As a business owner, I have subscribed to budget mail hosting services for my business emails. Such services mostly provide you a portal/webmail login; they usually lack a few critical features for modern usage. For example:
- You have to login via an URL to check your mail every time for each email account.
- There’s no mobile app to receive push notifications on your phone.
- Spam filters and virus scans may require additional fees.
Especially if you run multiple businesses, it will save you alot of time if you manage multiple email accounts within 1 platform. Continue reading to learn more!
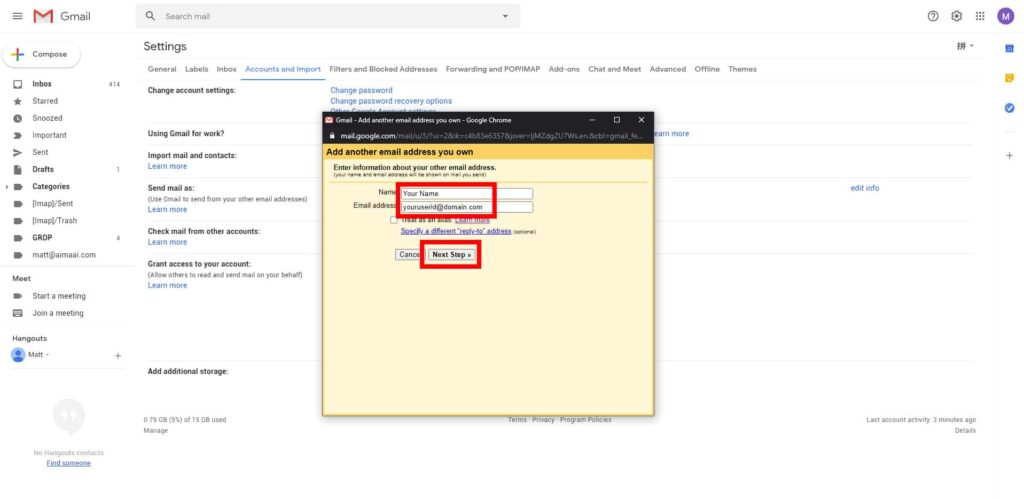
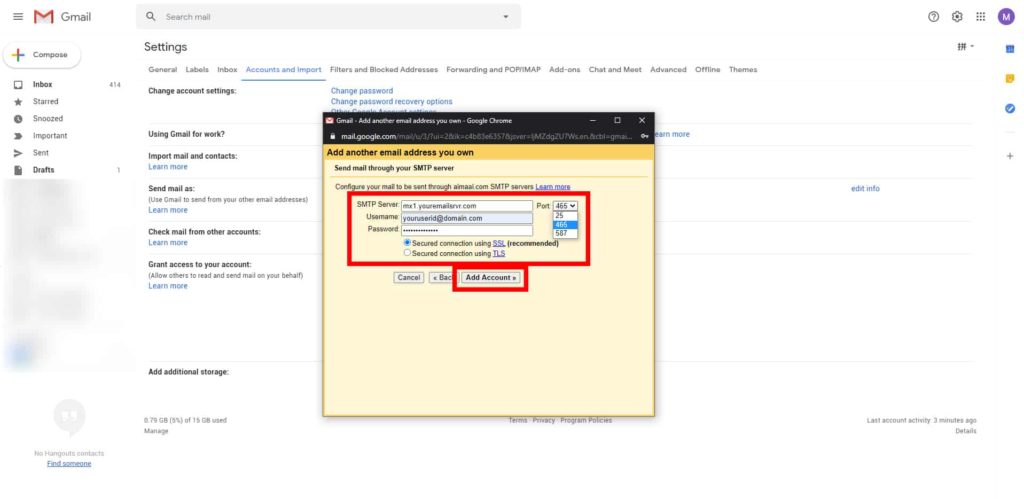
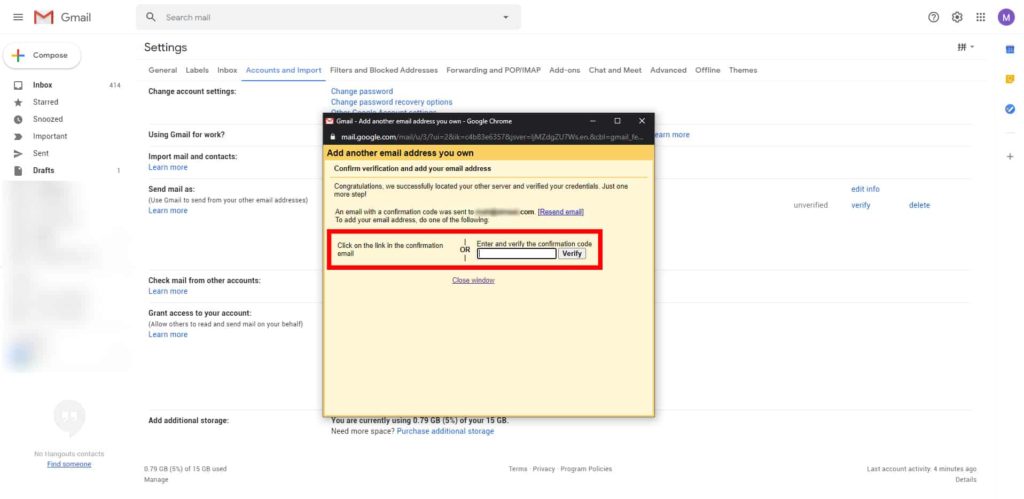
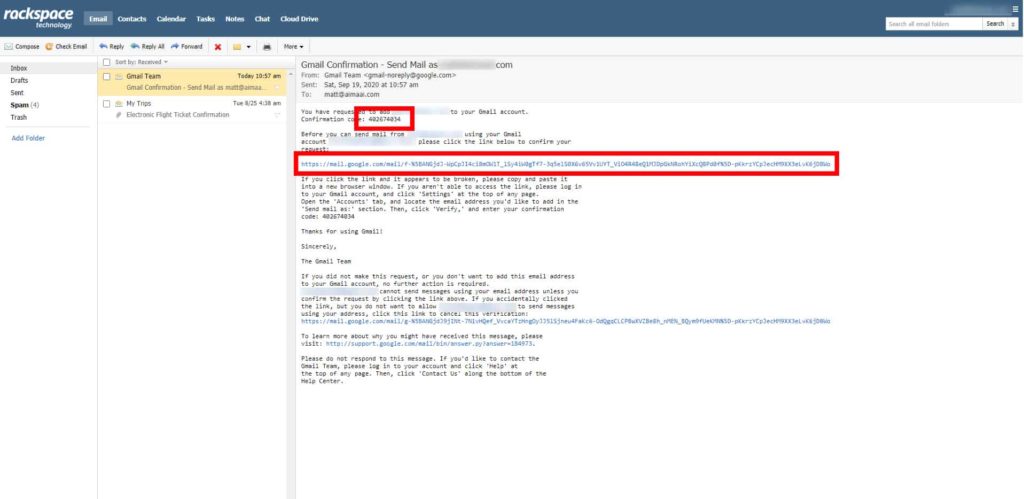
6. Here you will need to key in your outing SMTP settings. E.g. SMTP server, port number, email address, and login password. You can find the details via:
- asking your hosting provider thru email or live chat (if they have)
- your hosting provider may have send you this information via email during sign up.
- search with search engine, e.g. “company name” SMTP settings. In my case, I search for “Rackspace SMTP settings” and this is indicated in the search result:
Your Name: Your Name or Business Name
Login Name: Your Mailbox Email Address
Password: Your Mailbox Password
Account Type: IMAP
Incoming Mail Server: secure.emailsrvr.com
Outgoing Mail Server: secure.emailsrvr.com
Incoming Mail Server (IMAP) TCP Port: 993 (SSL)
Outgoing Mail Server (SMTP) TCP Port: 465 (SSL)
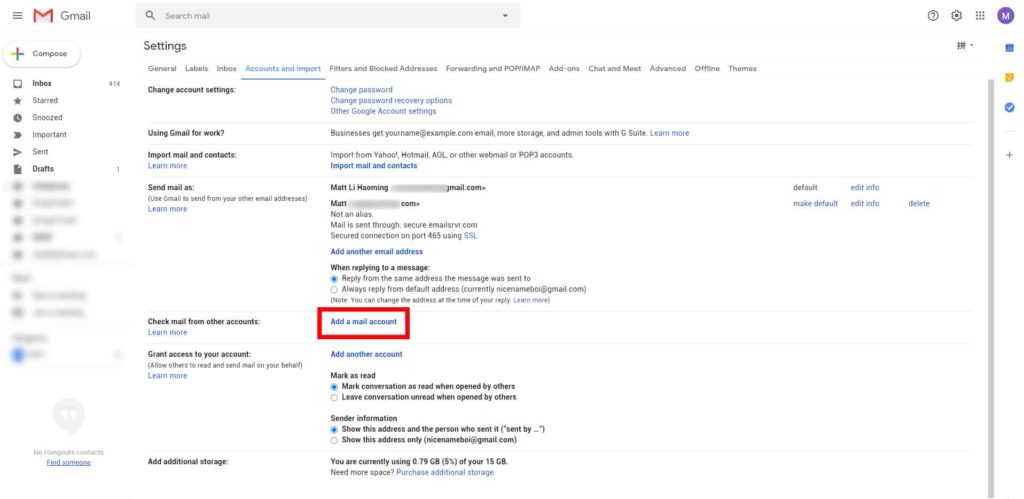
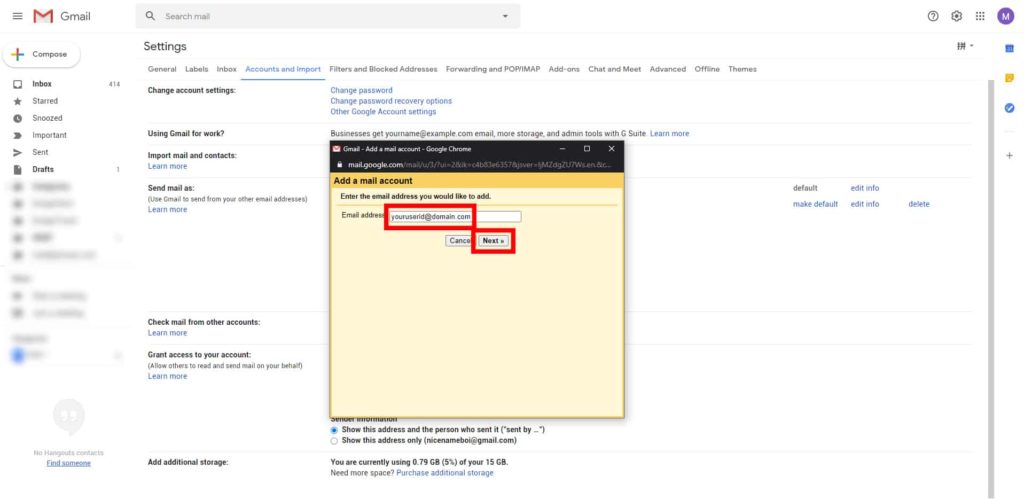
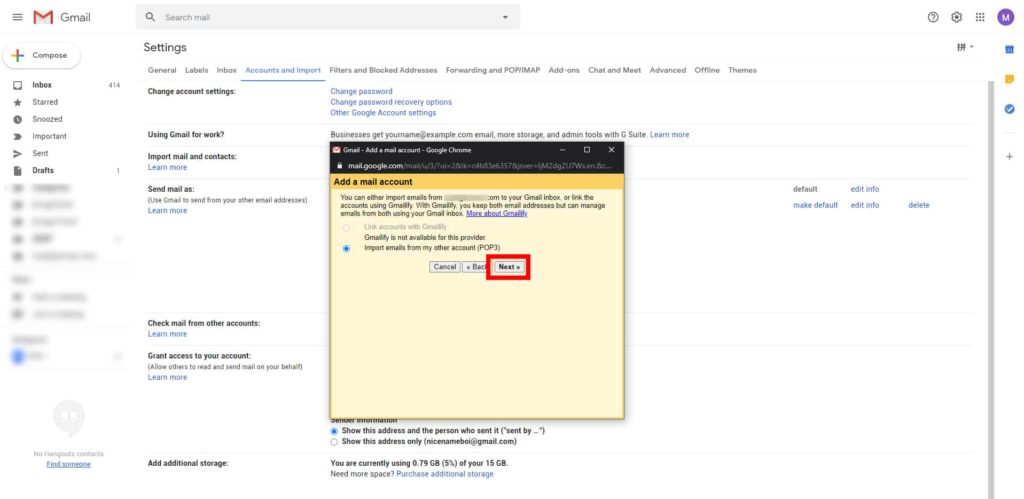
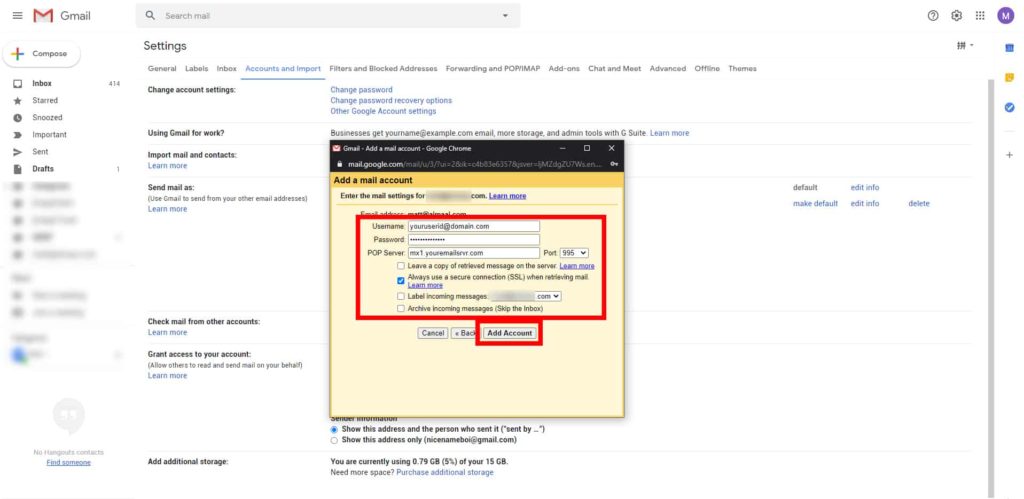
4. Key in your incoming SMTP settings. Check the checkbox according to your preference and click “Add Account”.
*You may check “Leave a copy of retrieved message on the server” if you wish to have a copy of the email in your mail hosting. If left unchecked, the email will be deleted from your hosting provider.
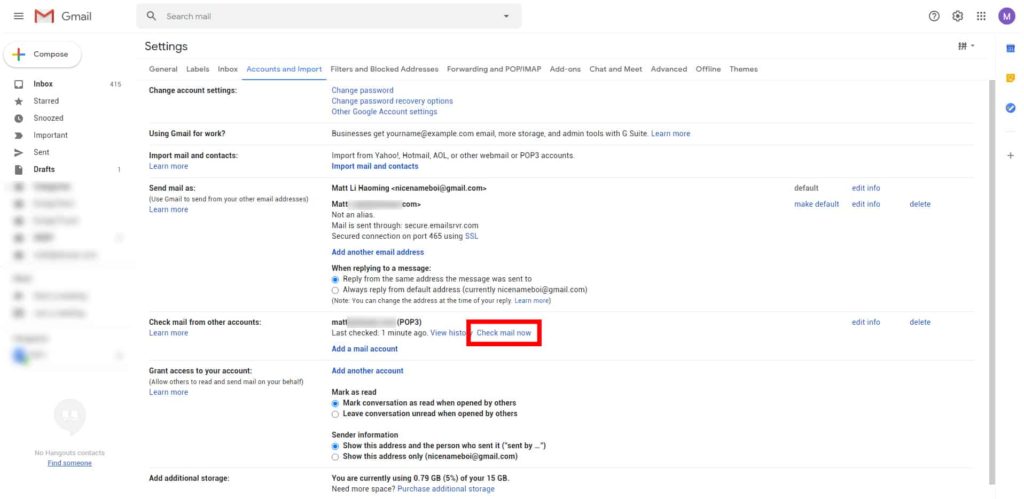
5. Once added, Gmail will begin fetching all the emails in your account automatically. It scans for new email periodically, between 15 minutes ~ 1 hour, depending on how often an email is sent to you. You can click “Check mail now” to retrieve email immediately too. Repeat the same steps to add more email accounts.
You should be able to receive and send out emails with your Gmail account after following the guide; there’s more functions available in Gmail. Feel free to click around to create more customization if needed—for example, a custom signature for each email address.
I hope you find this tutorial useful for you and feel free to like and follow my social profile to stay updated! See you!
